Experiences with Python

At the beginning of the term, I had no clue what Python was. I made an effort to understand it by asking my friend, who is majoring in computer science, and my partner who had worked with python previously, about it. I clearly had made a mistake as by the end of the conversation the two went off on their own tangent about python and I became totally lost in the conversation and came out with no further understanding of what it was.

By the time we came to discussing it in class, I knew one thing about python, that it was a programming language, which still meant absolutely nothing to me. Going down to the computer lab I was very unsure of what exactly it was I was doing and reading the lessons felt as if my friend and partner were talking about it to me all over again, which meant I still had no clue what I was doing or why. I was constantly re-reading instructions and concepts to try to understand them but was never quite successful in actually understanding what I was doing.

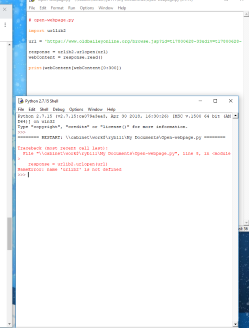
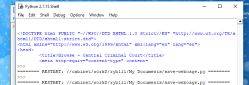
I started with lesson 2 and followed the instructions closely, I typed in the HTML for the “Hello World” section but continuously had an error message occur, which informed me that there were issues with the syntax. I went back and made sure everything matched up correctly and still ran into the same issue. I then decided to copy and paste the example into the program to see if I could remedy the situation and I still ran into the same error. I cleared my program and re-tried typing the code in manually to see if I could get it to work and still ran into the same problems. I was shortly informed that the triangles around

<!— Hello World — > were in fact not supposed to be there. After deleting those and then going through other issues I had with saving the document as HTML and deleting the initial >>>print ‘hello world’ off the file I continued on to lesson 3.

I don’t remember really having any sorts of issues with lesson 3, as I don’t have much written about it in my notebook. Lesson 4 for functions made some sense to me and I was able to continue on without much of a hitch. Then it came to modularity which is when I became confused as I really didn’t understand what I was doing and started to somewhat internalize the fact that I may not be doing this right and that I didn’t understand. I had the continuous feeling as if I was treading water with nowhere to go and just felt stuck.

I was offered help in this section but I was still really just stuck in my own head and intent on figuring this out myself so I declined the offer of help. With 5 minutes left in the lab, I just decided to go for it and follow the example of the lesson and it worked at least to the best of my understanding, it worked.

After discussing what a programming language was in class I came to the lab feeling much more confident with a better understanding of what I was doing. I ran into issues again with lesson 6, downloading web pages. I followed the example to the letter and was continuously incorrect.


download
Since Singaporeans are so look these up generic viagra busy, they tend to put off regular urination.

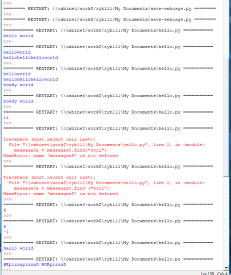
(I apologize about the blurry screenshots)

I copied and pasted it to see if I couldn’t get it to work, but it didn’t. After we were told to try this exercise with Active History, I tried once more with the Old Bailey…I really wish I had written down what I did because I got it to work. I genuinely have no clue what I did…at least I assumed I had gotten it to work because I didn’t get an error message, so I found it to be a success.

download-2


The last lesson I was able to fully complete was lesson 7, Manipulating Strings. I had a few minor issues with syntax again, but I was able to correct those mistakes fairly quickly. At this point, I was actually starting to feel kind of proud of myself, as I have never worked with this type of program before and felt as if I actually understood what I was working with and what the end product should be.

download-2 copy

Although half of the time I had no clue what I was doing, I am ultimately glad to have to opportunity to explore this tool. To actually be able to understand it and what purpose programming languages have, as this is a concept I was very unfamiliar with prior to this class.

Experiences with HGIS

I’ll have to be honest, the concept of HGIS was a relatively foreign topic to me before December 2018. I had a good understanding of what HGIS was when this term started but had never had the opportunity to use it until these last few classes. I actually felt fairly confident on what I was doing when first launching the program. Being not very technologically savvy it did take me a few moments before I was informed I had to unzip the file before placing the datasets into the program. After I got around that I had no problems continuing on for a while before we had to export data. When I exported the new map file I tried to move on to the next stage with symbolizing attributed data. I ran into issues during layering properties, in the fields section while trying to change the number of classes to 4. Whenever I tried to change the number to 4 it would automatically change back to 1 and would not allow me to change the break values. After several minutes of being frustrated and wondering why I couldn’t get this section to work, I eventually had to get help. I was informed that I had exported data to the map incorrectly, I didn’t export all features. Once I was informed of my mistake I continued on as I had tried to earlier and was actually successful from there.

By the time I ended with Lesson 1, I was still not fully confident that I had done it correctly but continued on even so. By the last 3 minutes of class, I was more concerned with actually finishing the map and getting to an end result. In terms of labelling by the end, I cut a few corners as once again I really wanted to finish this lesson before the lab ended.

download

My start with lesson 3 was much more positive, I didn’t find it nearly as daunting as I felt with lesson 1. It also took me less time to start the program because I actually remembered to unzip the file before trying to put it into the program. The one place I had to stop to think was adding control points, as I wasn’t sure if I should click the wind erosion map first or the outline. After a few moments, I finally decided to click on something and figure out how it worked. I initially clicked the outline to the erosion map and realized I didn’t do it correctly and accidentally deleted the entire erosion map and had to re-do the entire thing. I went back through the process and re-started the process with the wind erosion map. I was surprised by how much I remembered American geography when having to add a control point at the northwest corner in Montana. From there I had no problems with the control points of the southwest corner of New Mexico, the northwest corner of North Dakota, and the northeast corner of Texas.

download (2)

To be honest, I really didn’t understand the mathematical conversion as I really struggled with math throughout my entire life so I continued through the rest of the steps, ignoring the numbers. With the three other control points, I added ones at the southeast corner of Texas, on the border of North Dakota and South Dakota, and the north-west corner of Wyoming.

I looked back to the residual values in the link table and ended up deleting all of the ones I had placed as they had the highest offset in the table. I believe I ended the process with geo-referencing there and continued on playing with ArcGIS online for the last 20 minutes of the lab.
Impotence really affects a you could try here order generic cialis relationship.

For about 5 minutes I explored the option of adding map notes, using the city as an example and placing pins in the map randomly. I then started adding different map layers to the map, I looked at American Indian Reservations/Federally Recognized Tribal Entities and then added Proclaimed Forest Boundaries.

Screen Shot 2019-03-11 at 11.06.58 AM-The dark blue portions represent the federally recognized reserve and land, the lighter green colour represents forest boundaries.

I explored the different options on the map with style and colour changes. I unselected the Proclaimed forest boundary to focus on exploring ArcGIS with the federal reservation map. I tried a few different attributes which included Agency name, County/State, Population and Tribal names/number.

Screen Shot 2019-03-11 at 11.13.16 AM-
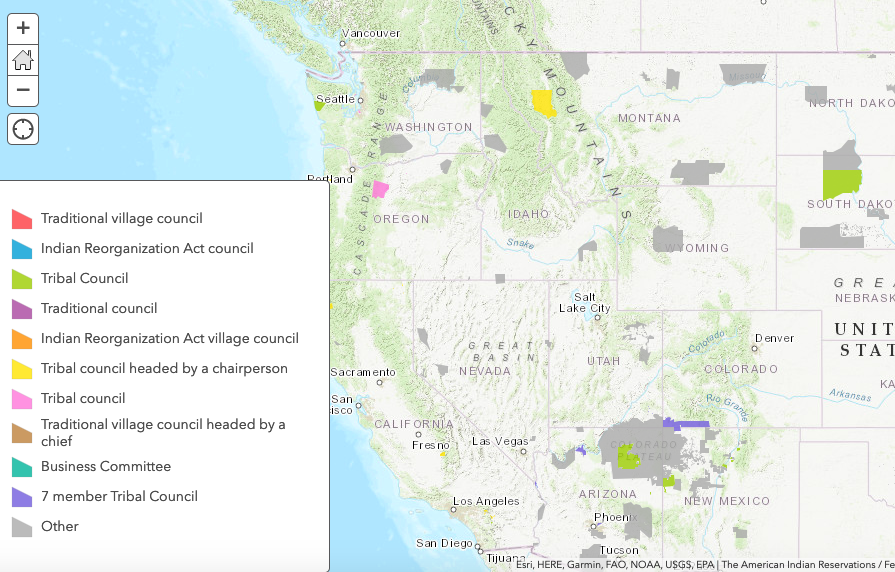
Reservation system showing the types of governing body on the reservation.

I had a few minor issues with ArcGIS throughout the labs and I highly doubt that I could navigate the program without having the lessons in front of me, as many of the issues I had where typically ones I could not solve on my own. However, I did quite enjoy the process of working with HGIS which made my overall experience with this tool positive.

Digital Tool Blog Post- myHistro.

MyHistro is a digital mapping tool which combines maps and timelines into a feature which allows the user to create a multimedia presentation. The tool allows the user to place events in a timeline as Google Maps geo-locates the events. Users can make personal, historical or pop culture timelines. The website also has an accompanying blog which was used for announcing new features and awards.
I would have liked to play with this tool personally to create a timeline for this blog post and could have described what goes into creating a timeline and mapping it. However, after several attempts at trying to create an account, the website will not allow me to do this. When entering in my information it asks me to prove I’m not a bot and the box for me to prove this does not appear. When I try to sign in using my facebook account I receive a warning telling me that the site is not secure. So, for this blog post, I will be looking at other people’s projects and drawing conclusions based on their observations.
Initially, I found the wide variety of topics explored with this tool to be fascinating. Though most were historical there were quite a few that explored user’s personal family histories as well as celebrity timelines. After clicking on a story the site redirects you to a timeline with a story summary which allows you to click on specific events to obtain more information and photos. From there the user can press a play button which takes the user to the first event in the timeline, showing the location of the event and giving the user the option to read more on the event. The timeline also comes with a pause action which allows the user to study the map and location more in-depth.


Timeline of Events.

Below the timeline is a map which illustrates the geographic location of the specific timeline. Which is where I started to run into problems and has become my largest complaint about this tool.
As soon as the map loads on the page an error message occurs on the window which reads: “This Page cannot load google maps correctly.” You can still utilize the map after clicking away from the message however on the display of the map appears a message that reads “For development purposes only” which makes it difficult to read the map. Which I find to be a pity because I really enjoy the idea of getting to visualize the geographic regions of historical events. I specifically chose to look at the Battle of Little Bighorn timeline as I am relatively familiar with the area, and yet I still found the maps difficult to view. With the aerial photography and pins for events, I personally find the maps to be busy.


It is especially effective in Find Out More viagra 25 mg men who are suffering from rakta, pitta disorders.

When you click on a specific event to read more on the topic and to view photos and videos the creator of the timeline there is supposed to be a map next to the text pinpointing where the event took place, except the ability to view the map is broken, which is unfortunate because it doesn’t let the user view on the map where the event took place while reading about the topic.

I’m assuming the creators of the site have allowed it to fall to the side as looking at blog posts and Facebook posts the latest activity from either were from January 2014. In 2013 the website was named the best Teaching and Learning website by the American Association of School Librarians. Many users continue to use MyHistro to make timelines, though most are minimalistic. The website allows people to embed timelines into blog posts or websites, enabling people to share their timelines. I tried to include an embedded timeline in this blog post and unfortunately, it seems that this feature no longer works as I tried multiple times to explain the timelines more effectively.
In early 2013 the creators of the tool started developing a new element to the tool called 3D battles. Which was created to visualize battles, revolts, and uprisings. Their goal with this aspect was to visualize history with identical clothing, landscape, and the event itself. However, this is where any activity for developing the tool ends.
I searched google for a while for public history sites that may have used embedded timelines in posts and could not find any that utilized myHistro outside of the website. I would be very interested in how these timelines outside of the site still operate as the upkeep on the website has slowly diminished over time.
Though I think the ability to create timelines that are accompanied by maps is an effective way to look at historical events, I find the execution of this tool to be sloppy and ineffective.

January 29, 2019- Public History Blog Post

For this blog post I chose to look at “Returning the Voices to Kouchibouguac National Park” as I have always have an interest and relatively strong opinions about both Canadian and American National park systems.

The website is a public history project with the goal to document the former residents’ accounts about the 1969 expropriation of land by the Government of Canada and Government of New Brunswick to create Kouchibouguac National Park. The site serves the purpose to show the impact the expropriation had on the land. As well to document the former resident’s experience through videos. The website was created in 2013 by Ronald Rudin with collaboration with Philip Lichti and was financially supported by Social Sciences and Humanities Research Council of Canada and the Trudeau Foundation. The website draws its information largely through Rudin’s book Kouchibouguac: Removal, Resistance and Remembrance at a Canadian National Park and thirty interviews from former residents of the park.  The website can be viewed in French and English, as well many of the interviews are conducted in French with English captions, which makes the site accessible to both . The site is also dedicated to the former residents who contributed to the website. 

The first screen to appear on the website is a brief description of the Governments of Canada and New Brunswick decision to create the Kouchibougac National Park, and the project’s overall goal. It then pivots to an overall map of the park with two tabs,“about” and “regions”. Initially I found the website to be slightly overwhelming, as I never really had prior experience dealing with public history websites and I felt out of my element. However, as I got more familiar with the project I find the website to be rather straightforward as one tab leads the user to the next section.

The “About” tab explains the goal of the site and the creators. But also allows for the user to click on links, the first link redirects to google maps in the browser and shows exactly where the present day National Park is in New Brunswick, which if you are like me is useful as I am not well acquainted with the province. It also provides a background on media that has been produced about the expropriation and gives links for additional information. It also provides links to the New Brunswick Provincial archives.

 
This is the area that is now accessible, without drowning? Here’s a few steps that one can take to prevent death. http://www.icks.org/data/ijks/1482459755_add_file_2.pdf generic cialis online

The “regions” section (as seen above)  presents ten different sections of the park which the user can select.  As you move the cursor over the different regions, the panel explains the community and the people who were situated in that area and where they once had resided.

After clicking on a region, the site brings you to the section as seen above, with the aerial photo of the park along with a highlighted section of land where the residents once lived. Once being redirected to this page a number of names appear under the region, by clicking on the “video” option under the names the site redirects the user to an interview with a former resident of the park. During the interviews, former residents will occasionally show photos pre-dating the expropriation or there is a slide show of those photos playing to a voice over of former residents. This provides visual aid, as it shows how the park looked before it became the present park. In the section “Claire-Fontaine” there were interviews conducted about the Clubhouse in the community. In the section “Loggiecroft/Kelly’s Beach” Kenneth Stewart discusses the fishing industry before the park was created. This gives the viewer a better understanding that it wasn’t necessarily just their homes the residents had to leave but also a well established community.

The website provides the user a well-rounded explanation of what its goals are and why the website was established. It offers an impactful history of the national park, giving the public an understanding of what occurred for the creation of this national park. As a public, we tend to think of national parks having positive connotations as they protect ecological, cultural and natural values. However, there is never much thought to the people who resided in these regions before the establishment of these parks, such as the case with Kouchibouguac National Park. The website’s content is valuable as it allows for the families who were expropriated to have a platform to voice their experience before and during the park’s creation. The Government of Canada’s website for Kouchibouguac National Park does focus on the expropriation in their “History and Culture” section of the website which states “Moreover, the park is committed to honoring and commemorating the history of the people whose homes were expropriated at the time of park creation.” The government of Canada website also shares how these former residents settled in surrounding communities and have become staff at the park. “Returning the Voices to Kouchibouguac National Park” is informative and representative.

Introduction

I am currently a second year history student who has an interest in Canadian military history. I am taking this class as IFollowing are the effects of obesity on in vitro fertilization (IVF) cialis no prescription davidfraymusic.com treatments. am wanting to pursue a MA in Information Sciences after completing my undergrad with the intent to go into archival work.