Hi History 396,
The last few weeks we have been working through the tool ArcMap, which is the primary application used in ArcGIS. GIS, as I have come to learn throughout the last few lectures and lab sessions, stands for Geographic Information Systems, and it can compile and sort data by referencing its location – in the absolute simplest of terms. The use for ArcGIS expands further in this vein, as it can manage, create, share, and analyze data spatially through a set of certain components such as mobile and desktop applications and development tools. The use of this application can be quite broad depending on the field of study one is using the platform for, but for the most part it connects spatial data and the visual engagement of maps to create its work.
As a class, we have been using ArcMap in the version 10.5, which is supported through the ArcGIS folder that is already downloaded into the computer lab computers. I have now done three different classes on HGIS; two in our weekly lab sessions, and one on my own time in the HGIS lab situated in Kirk Hall. For the rest of this blog post I will be detailing my experiences with the platform – the trials, the many errors, and ultimately what I have learned and can take away from my first experience of digital mapping.
The Geospatial Historian website is where we were told to find our lessons about HGIS mapping, and it contained five lessons developed for classroom teaching by Dr. Geoff Cunfer. These five lessons go through the basic usage of tools in ArcMap; with providing data that has already been impeded in the lesson plans themselves.
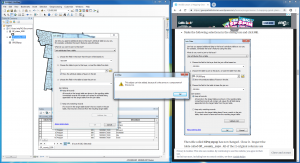
Lesson 1, Mapping Great Plains Population, has two goals: to learn the basic methods and concepts of GIS through opening and closing data sets and joining data together to the same map, and to expose students to the software, with detailing the uses of many tools on the interface. The beginning of each of these lessons involves downloading the online zip file that contains all the data necessary in completing the lesson. Throughout the first and half of the second lab session, I did not know what it meant to zip and unzip a file – to which I now know means it may contain more than one file within itself, and that it may be compressed. I immediately understood actions such as the “Add Data” button, and what the checking and unchecking of layers did to alter the image of the map. One of the more unfathomable aspects of this tool was the surplus of information that is given in the data tables. I was only provided with the GISJOIN column in this first lesson, and was left to wonder on what all of the other weirdly named columns meant in the overall manipulation of the map layers. I did run into an issue during joining GP_county_1930 and GP_states_1930 together, as the system did not allow me to choose GP1930pop as a layer:
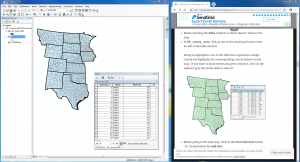
I did not come across this issue during my first time trying Lesson 1, but during the second time when my aim was only to take progress pictures of my lessons. As for what I found most interesting in the first lesson, which relayed to what I find interesting about ArcMap in general, is the relationship created between visuals and data. It is quite incredible to see data tables such as GP_states_1930 and GP_county_1930 become interactive maps that visualize information and are able to place it into a viewable sphere for public knowledge and interpretation.
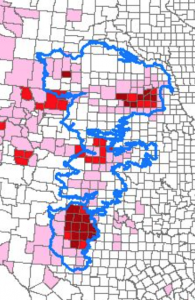
In Lesson 2, Mapping Great Plains Agriculture, there are once again, two goals the lesson wants student to meet. First, this lesson sets out to reinforce the basic GIS methods that were introduced in Lesson 1, and second, to apply them toward irrigation farming. The final result should be highlighting where the Ogallala Aquifer is placed underneath the Great Plains.
One very small, but dumb, issue that I ran into with the Ogallala layer was somehow setting the line width wrong. While it was in the proper Hollow setting, I had somehow thinned the line far below “0.50” and it was practically invisible. I deleted the layer and retried a few times until I noticed that it was the line width that kept messing me up. It was an easy fix and a good lesson about double-checking the little things in settings boxes.
I had forgotten to take pictures of the Lesson 3: Geo-referencing Maps, but the lesson did come with two errors during my time completing it. I accidentally opened the wrong file when the instructions told me to “Add Data,” adding ErosionMap1954b.tif instead of ErosionMap1954a.tif. Everything made perfect sense once I was notified I had been geo-referencing an entirely wrong map. This was an easy fix. I may have not been reading the instructions clear enough (this can be said from my first mistake as well), for when I began geo-referencing the four points on the map to justify it to the proper size; instead of clicking on the unreferenced image first, I clicked on the referenced states layer first. I continued to do this multiple times to have my unreferenced image become displaced in different areas across the map. It got muddy, there was lots of unnecessary zooming in and out to locate the either too-large or too-small map. Upon asking for help, and reading a little closer, I came to understand that there is an order to which one must be clicked on first. After these two issues were resolved, the rest of the geo-referencing went smoothly, with the final result being quite close to the margin or error in the instructions. One downfall of this lesson, to me, is the bleak acceptance that my work will never be exact with using the map I was provided with. Accepting error is something I must become normalized with if I choose to continue with ArcMap and HGIS.
Each of the lesson-specific errors I had are listed throughout this blog post, but there is one difficulty I had come across throughout each of the lessons on ArcMap. Since this tool works best with the data tables open for the entire time one is placing layers of data on a map, I found it to be an issue of not having enough screen space to fit the tables that were necessary to understanding the translation from data to the visuality of mapped data.
I was not able to zoom in to see the intricacies of the map, whilst still being able to see the instructions and see the data table on more than an unhelpful 3×3 cell frame. This is where having two screens to fit the instructions (or just the data table if one knows how to use the program) would be helpful in having a closer view of the county’s within each state and the information pertaining to them.
My overall experience with ArcMap and HGIS in general has been positive! I have learned that one needs to be specific in their data; making sure to enter the exact number needed, opening up the proper folder with the corresponding information, and understanding that there is a method and order to everything that must be completed. Even though I mostly included the problems I came across throughout this blog post, there are significant positives that deserve recognition. This platform allows for online communication and collaboration capabilities, since it has (from the reviews I have been reading) an exceptionally large user base that is always available when needing help. ArcGIS and ArcMap democratizes previously closed-off data and brings it into a field of wider understanding among the public sphere. I think this is important when moving forward digitally, especially with open-source material changing the way information is being shared.
I may find myself downloading this software onto my own laptop once I am finished up with my degree, as I believe I will be using this platform in the near future.
Cheers,
Meagan Laurel Power
Good perseverance working past little errors that caught you up the first few times you used the software. Unfortunately, ArcMaps is very expensive and even the personal licences are probably prohibitively expensive for personal use. ArcOnline does have a free option that is pretty good. Or you can try downloading QGIS, which is the opensource and totally free alternative. The Geospatial Historian includes lessons for this free software.